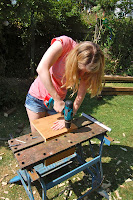
I took my inspiration after a trip to one of our local home furnishings shops. On sale were these storage cubes on little feet which were really sweet and I was tempted to buy a couple... until I saw the price. £45 for what is essentially 6 pieces of wood - I don't think so. I decided to make one myself with a few added touches.
I had a few scrap pieces of wood, a tin of wood stain, some spare fabric, wadding leftover from another project and some spare tacks and hinges in the shed, so all I needed to find was some foam and some wooden feet. I was on a mission. A trip to the market later and I had the foam square (for 50p)! Next the feet - If you had time then I would suggest searching markets and carboot sales for old stools where you can chop off the feet. TIP: Alternatively you could make it a little bit more contemporary and use brass door knobs as feet (I was very tempted). But I was determined to find the perfect thing the same day, so I logged on to eBay, and to my delight found 4 hand crafted wooden feet. PERFECT!
Now here's how I put everything together...
My first tip would be to draw out your plan and make sure you've got the measurements correct. There's nothing worse that chopping all the bits of wood and finding out that it doesn't fit together.

Once you have your plan, you can start cutting your wood to size. I based my sizing on a couple of books that I was intending to store inside. Once you're done, make sure they are all sanded down and then you can start assembling.
I chose some 180 degree hinges, but you can play around with some in a DIY store. Some you can see when you close the box, some you can't.
TIP: I would always recommend pilot holes before putting in the screws, that way your wood won't split, especially if it's a fairly thin piece of wood!
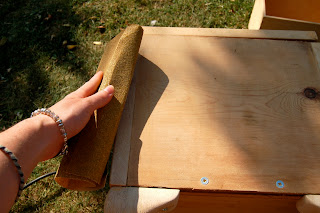
Once everything is screwed together (including the feet) it's time for one last sand. Maybe you'll be more accurate than me, but I always end up with a little overhang of the edges when screwing things together, so I like to sand everything down so it's all nice and inline.
Got your wood stain ready? Time for painting! You could change the effect of the stool by painting with emulsion and then sanding it down for a weathered look, but I wanted a more simple design, so I got my paintbrush and gave the box two coats of stain. Now that everything is painted, try and balance your box so that the least amount of edges are touching the surface so that everything can dry. If you were more patient than me, then you'd wait until one side was dry so you could lay that side down to paint the rest....but that's a little bit too sensible for me...


Now, I happen to think this box looked good without the fabric cover on, and I almost stopped at this stage - but I had a plan, and I stuck to it. On with the foam and wadding!

Cut out your foam to the size of the lid, and a piece of wadding big enough to stretch over the foam and down to the bottom of the lid. Cut your fabric about 1cm larger (on all sides) than your piece of wadding. Now for the fiddly part - if you have a helper, call them over.
Lay your foam on the lid, wadding over the foam, and material over the wadding. Next your going to take 4 tacks and hammer them in on the middle of each side - pull the material tight over the foam and wadding, making sure the whole lot stays
central on the top of the box, hem the material so that the hem line is inline with the bottom of the lid, and hammer in your tack. Well done, you've done the most difficult part!
Work your way around the box with more tacks, folding the corners neatly, making sure to pull your fabric tight all the way around.
And that's it, you're done. One functional, yet beautiful footstool. Anyone can give this a go. And if you're worried about the woodwork, do not panic, if it ends up a little wonky just cover all the sides in fabric!
Send in pictures of your boxes :)


No comments:
Post a Comment